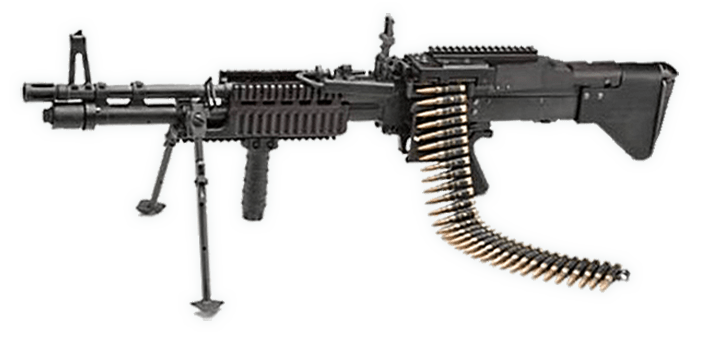
The M60 semi auto project is one of my bigger ones, work and cost wise. I’m still in the process of collecting all of the parts, doing machine work and building the receiver. In this section Ill outline how I am going about this project. Some parts I will make from scratch and some I will buy partially completed and finish them. There is an ATF approved design for the closed bolt, belt fed M60 and I have all of that information on had as well. I will updates as the build progresses and post pictures and images of the work.
I’m going with the E4 M60 because it is the most recent “tactical” version of the gun and has some design changes that are improved upon since the original E1 design. I will outline some of this in my text below as well. I may not incorporate all of the E4 updates but I would like to have as many as possible. Some I may upgrade to over time just because of the cost and time in trying to get the project done.
The main concern with this and many of my other projects is to get the receiver built. Getting the receiver built, pre existing and serial numbered is my main priority.
Main highlights:
- Receiver Construction
- FCG Assembly
- Semi Auto Bolt Modifications
- M60 E1 and M60 E4 Differences
M60 Receiver Construction
Images to come:
I have the sheet metal lower channel, complete. Only a minor slot needs to be cut in the bottom for the semiauto trigger linkage to pass though. I will show more and explain more with the photos.
Images to come:
I still need the rail set, bridge and rivets to finish this receiver. Its also good to have the yoke and even the bolt when assembling to make sure everything is in the right place. I will need to get these parts as well before assembling.
There are block off plates that need to be welded to the side rails to prevent the full auto M60 bolt from fitting into the receiver. This can be a welded on or if you mill the rails from scratch you can simply leave this material in place. I will most likely buy a set of 80% complete rails or a finished set of M60 full auto receiver rails. Either way I will weld on the bolt block offs. I have blueprints to mill a set of rails from scratch but to save time I will likely buy them or finish a set using the prints.
Hopefully by the time I’m assembling this receiver I will have some other parts to test fit as well. I don’t want to get it built and find out that the barrel doesn’t fit the trunnion or the barrel locking pin hole is to big or to small. Anything is fixable but I will try to have on hand most of the bolt and barrel assembly parts when riveting and welding the final receiver together.
M60 SLR FCG Assembly
The Fire Control Group for the semiautomatic M60 is quite different than the full auto open bolt system. It is very simple and consists of a slimmed down version of the M1 Garand FCG. The housing sits off center bolted to the right side rail, inside the receiver. This allows the gun to fire in closed bolt, semi automatic. There is a short linkage that runs from the trigger to the secondary trigger in the FCG.
Most of the parts need to be made from scratch or purchased from one of the few who ever made them. A machine shop could make the parts from the semi auto M60 FCG blueprints as well. I have the drawings on hand and plan to make a set for this project.
It is much harder to describe this then to show it so I will post more info and photos of this as it progresses!
Images to come:
M60 Semi Auto Bolt Modifications
Basically the stock M60 bolt needs to be milled to allow it to fit into the semi auto receiver. Also some other modifications need to be made to it and the operating rod.
It is much harder to describe this than to show it so I will post more info and photos of this as it progresses!
Images to come:
M60 E1 and M60 E4 Differences
The receiver itself is the same. Most of the differences are in weight savings.
- The E4 M60 is quite a bit lighter than the E1
- The E4 top cover can be closed with the bolt forward
- Some E4 top covers are milled billet aluminum
- The barrel is shorter and has a slimmer profile
- E4 barrels have the carry handle built in not attached to the trunnion
- The but stock and buffer are assembled together in the E4
- E4s have different sights and “attachment” parts
Images to come:


